 |
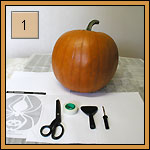
Tools:
- A pumpkin (look for one that is tall enough). The width playes an inferior role.
- A pattern
- A poker (this can also be a thick needle)
- Ducktape or punaises
- Scissors
- Pumpkin Scraper Scoop and basic pumpkin saw (available in the "shop")
- Kitchenpaper, kitchenknife and bowl
- Old newspaper for under your pumpkin.
|
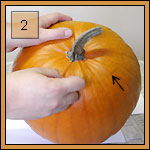 |
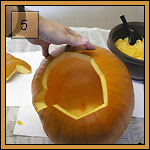
Draw your lid, with the poker, on top of your pumpkin.
On the backside of the pumpkin, make some sort of "tooth".
|
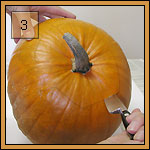 |
With the kitchen knife (or basic saw) cut out your lid carefully. Let this be done by adults.
Try to cut the lid a bit oblique.
This to prevent the lid from falling through when it shrinks a bit after a day or 2.
|
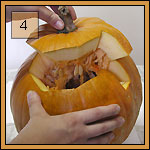 |
Take the lid of the pumpkin. Notice the "tooth" on the back of the pumpkin.
This is for extra support of the lid and as a guide for replacing the lid.
Cut away the seeds attached to the bottom of the lid.
|
 |
Clean out (with the Scoop) the strings and seeds inside the pumpkin. Remove these. Then you can scrape further until the pumpkin wall is about 1" thick.
You can use the scraped out pulp for soup, pies, or other recipes.
Clean out the inner wall until smooth - if possible. This can be a bit tricky. Don't forget to scrape the bottom of the pumpkin until flat (for placing your candles later). After all this, clean out with some kitchenpaper (or other absorbant paper).
|
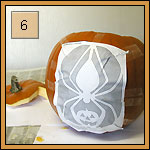 |
With tape (or other relevant material), attach the pattern on the frontside of the pumpkin. You can trim the pattern if desired. You can also make small folds when you cut the black slash lines to get the pattern more smooth on the pumpkin.
|
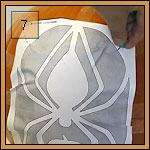 |
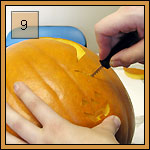
With the poker (or thick needle), poke holes (about 1/8" or so) along the pattern design lines.
|
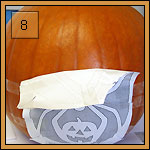 |
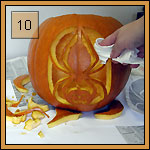
When you're done with this all, take the pattern of carfefully and refer to it while carving. You then see the dots you made in the outer pumpkin wall.
|
 |
Saw patiently and carefully with the saw, according to the instructions on the pattern (if they are there), along the dotted lines. Saw at a 90° angle to the pumpkin and saw steadily.
Never use pressure because the saw can break if used incorrectly. In general, you first saw the smallest pieces (or from the center out) and then work your way to the largest pieces.
If you saw a piece away, you can use a needle or toothpick to place it back. Push out the cut pieces with your finger and not by using your saw blade.
|
 |
When done with sawing, clean out the carved sections with some kitchenpaper. Don't forget to clean out the inner pumpkin as well - carefully.
|
 |
The pumpkin is now ready!
|
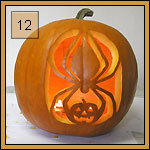 |
Now we only need to place theelights or a candle inside the pumpkin. You can let the theelights or candle blacken a spot on the lid. You can then saw a chimney where the blacken spot is to vent smoke and heat. And then you dim the lights ...
|
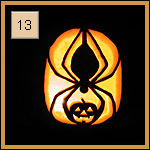 |
... there you go - your own Halloween pumpkin! Have fun!
You can find this pattern on the "Patterns"-page.
|
| |
I use the medium saws the most for the more complicated patterns.
- top -
|